|
|
Every student has a hidden voice to be unlocked.When you mention Minecraft or Legos to students, what is their response? Do their eyes open wide? Do their mouths start opening and ideas pour out? I could do this with this type of block or merge this block with that block and a iron block will appear. Teachers don’t have to exactly understand how the blocks are created but the students can tell us what is happening with the energy that we have always looked.
This project was done with a 2nd – 4th grade robotics elective and with a 2nd class. With modifications, it can work with any elementary or middle school class. For older students, a monetary value can be added to the cubes to stay within a budget. This experience can be a whole quarter where it can be done 20 mins here and there or modified to fit an hour and half. Both classes have groups of three work on each part of the space station. |
POSSIBLE ACADEMIC CONNECTIONS
|
As much fun as it would be to build cubed worlds just because, you probably have some academic content that you're responsible for teaching. Below is a list of academic skills that I've used this project to support to get you started. There are many others that we will discover as we go, and we can continue to add to the ideas shared in our Slack group. |
|
Timeline and grade levelDepending on the complexity of the Paper Minecraft build, you could complete this experience in 2 hours or several weeks.
User research timeline: Oct-Nov: Dive into the Experience - the actual activities of the Experience could take 1-2 weeks, however we want to give plenty of time to make it work for your schedule. December: Follow-Up 1-hour conversation with us - we’d love to hear your feedback on the Experience, so that we can improve it. |
Materials
|
OUR COMMUNITY
A big part of this experience is talking to other educators who are also trying out some of these ideas. Before getting started, let's get you set up with the tools below to communicate with each other. Click on each one to set up your account, introduce yourself, and get to know everyone else!
For more about why we chose these tools and how to get started, click here.
For more about why we chose these tools and how to get started, click here.

Use Twitter to share your experience with the world! Photos, resources, etc. Tag your posts with #papminecraft to pull them into our feed.
|
Use Slack for ongoing chats with this community: ideas, questions, advice, victories, and high fives.
|
Use Flipgrid for reflecting and sharing excitement in video form. No need for an account.
|
Use a Participate collection as a portfolio of all the amazing stuff you and your students do. More on this toward the end, but go ahead and set up a free Participate account now.
|
Introduce yourself! |
Check out our feed! |
RESEARCH IT.
|
What is your school mascot? Where do it live? How does it communicate? How does the mascot relate to your school? If the mascot is an abstract object, where did it come from? This experience may be an opportunity to invite an administrator into the classroom for students to interview.
|
|
|
|
|
|
|
|
The Right Tools for the Job
Research time! Regardless of the profession, all professionals need to carefully record and organize ideas. Work to together decide a plan for students to keep track of their research and their design work. Once organized, everyone will be ready to start researching! Brainstorm different professions that work to build communities on land (e.g. architect, engineer, etc.). Ask students to brainstorm tools that those professionals may need to complete their jobs. Then ask them to consider what careers in building underwater or outer space habitats could look like. Architects and engineers would likely need to be joined by scientists. Ask students to consider what types of scientists specialize in marine science and also in space. The above videos can be used to help develop frameworks. |
Plan for Your Person
As with any design project, it is important to know who you are designing for! After students decide if they will be building for underwater or space, they should then add the human element. Give each student one piece of paper and ask them to fold the paper in half. On one side of the paper, ask students to draw an image of a representative inhabitant. Students can start by adding personal details such as a name, job, and hobbies, but then they should consider the needs of their individual person. Encourage students to be messy in their drawings and add lots of details and words. On the right side of the paper, invite students to detail a typical day of the person from start to finish. This activity can then be used to help move students from concrete understanding to abstract ones for the next activity of What Our World Needs. |
What "Our World" Needs
Building habitats in underwater or outer space worlds is essentially shifting to thinking of spaces “out of this world.” As a group, create two anchor charts or collaborative Google docs for brainstorming on ideas for needs to consider when building. Title one chart/doc “What Our Underwater World Needs…” and the other “What Our Outer Space World Needs…” Use the following questions as prompts to help guide students to complete the lists:
|
THINK IT.
|
Now that you know what is needed for survival, it's time to design the living quarters.
|
|
Design Teams: GO!
Divide students into two groups (i.e. “design teams”) and have them first outline the individual sections of the habitat. Ask students to refer back to the anchor chart/doc to ensure the habitat of focus (underwater or outer space) addresses all the identified needs of the space. Once the areas are listed, ask students to each create a data table with columns: (1) area name, (2) area purpose, (3) number of blocks, (4) color of blocks, and (5) designers. They can work together to decide upon titles of each of the areas, and then they can record the area names and descriptions/purposes in the tables. This information should be recorded by each student. Next, the students (i.e. designers) can divide up the areas and assign individual sections of the habitats to smaller groups of students. Be sure students agree upon a common scale so that the pieces of the station will match up. |
Design Teams: SKETCH!
Using graph paper, students can work in small groups to design the individual sections of the habitats. Here they will need to obtain information to answer the questions:
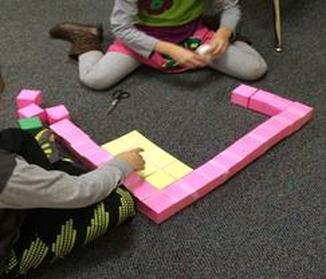
Have the students use the information recorded so far to draw out a plan. When I did this with my students, the students decided how big the floor was going to be. This is a great time to talk about base 10. We decided on the floor being 8 blocks wide. The reason for 8 instead 10 is that 4 of the large blocks equal 5 of the medium blocks. We let the students figure this out by measuring the blocks to figure out the ratio. Students had to show us how they figured out how many blocks they were going to need for their floor. There were a mixture of 3rd -5th graders in this class so we had a variety of methods to find out how many blocks were needed. Students can record this new data in the data tables. Groups of students can also work to create mathematical models or equations to represent the blocks needs. 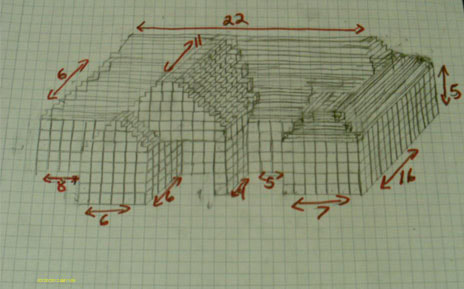
|

How are your students responding to the project so far? What are you noticing about their learning?
|

If you're stuck, reach out! If you discovered something amazing, share the love! If you want to brag about how brilliant your students are-- we want to hear!
|

Share the genius ideas your students are coming up with-- post photos or their designs or quotes. Use the hashtag #papminecraft.
|
MAKE IT.
|
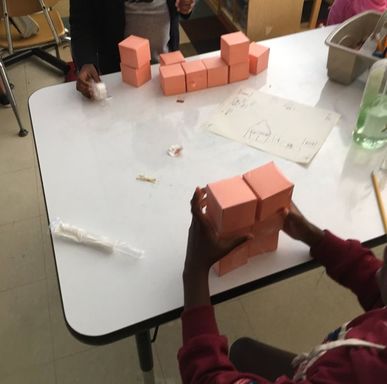
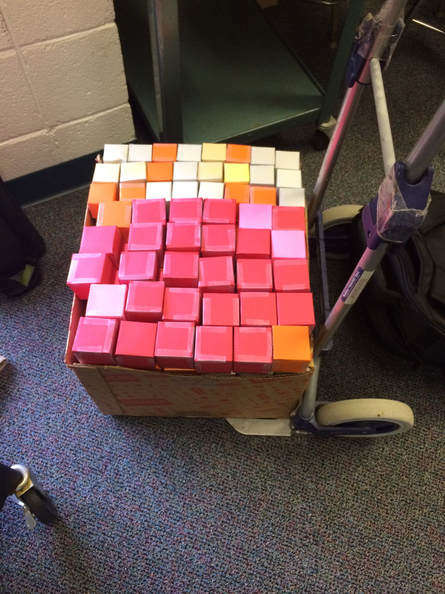
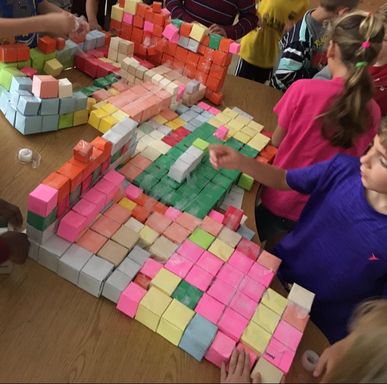
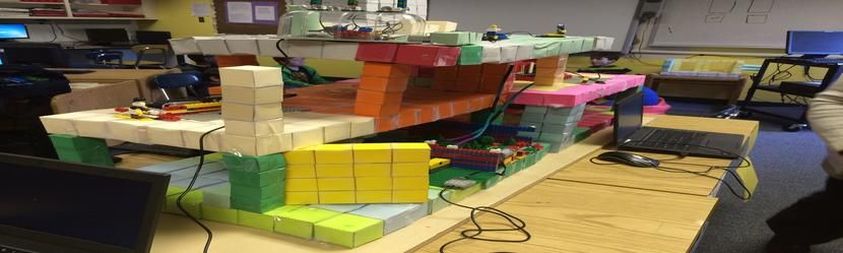
Now it's time to fold your blocks and build your station!
|
|
Tips and Tools
|

How are your students responding to the project so far? What are you noticing about their learning?
|

If you're stuck, reach out! If you discovered something amazing, share the love! If you want to brag about how brilliant your students are-- we want to hear!
|

Share the genius ideas your students are coming up with-- post photos or their designs or quotes. Use the hashtag #papminecraft.
|

|
SPREAD THE FIRENow that you and your students have gone through this experience, it's time to share your own story with others and light the next candles.
|
Craft a story about this experience. This story can look like anything (video, blog, interpretive dance, etc), but think about the stories that catch other teachers on fire. These stories have the following in common:
- Visual: What did this actually look like in your classroom? Show us! Even the messy parts!
- Student Impact: Talk about your kids! Did they love it? What did they learn? How do you know? (Need help assessing this? Consider using a rubric like this.)
- Educator Impact: Be honest: how was this for you? What did you love? What made you super uncomfortable? What does this mean for you as a teacher moving forward?
- Real Voice: Be yourself and avoid eduspeak; jargon doesn't make anyone feel like they're on fire! How would you talk about this with your colleagues, family, and friends?
- Shareable: How will you get this out to the world and into the hands of people who need to hear this story?
Step 1:
|
Step 2:
|

What's Next? |
Check out some other experiences you might enjoy.
|

|
Keep in touch with this community! |
|

|
